국비지원 JAVA에 관심있으신 분이나 교육과정 어떤 걸 선택해야할 지 고민이라 들어오신분은 댓글 남겨주시면 제가 아는 한 상세히 설명드리겠습니다!
CSS
인라인 스타일 시트
직접 css 만들기
.css
h3{
  text-align: center;
  color: pink;
  background-color: antiquewhite;
}
<!DOCTYPE html>
<html lang="en">
<head>
  <meta charset="UTF-8">
  <meta http-equiv="X-UA-Compatible" content="IE=edge">
  <meta name="viewport" content="width=device-width, initial-scale=1.0">
  <title>Document</title>
<style>
  p{
    color: red;
  }
</style>
<link rel="stylesheet" href="css/style.css">
</head>
<body>
  <h1 style="background-color: aqua;">Hello CSS</h1>
  <p>CSS연습</p>
  <h3>이것저것 스타일 적용해보기</h3>
</body>
</html>
선택자(제일 중요!)
내가 원하는대로 정확하게 스타일 적용
타입 선택자: 직접 태그명을 써서 적용
전체 선택자: 모든 것을 동일 하게 적용 시킬떄 (*)
클래스선택자: 해당클래스만 적용
아이디 선택자: 해당아이디만 적용
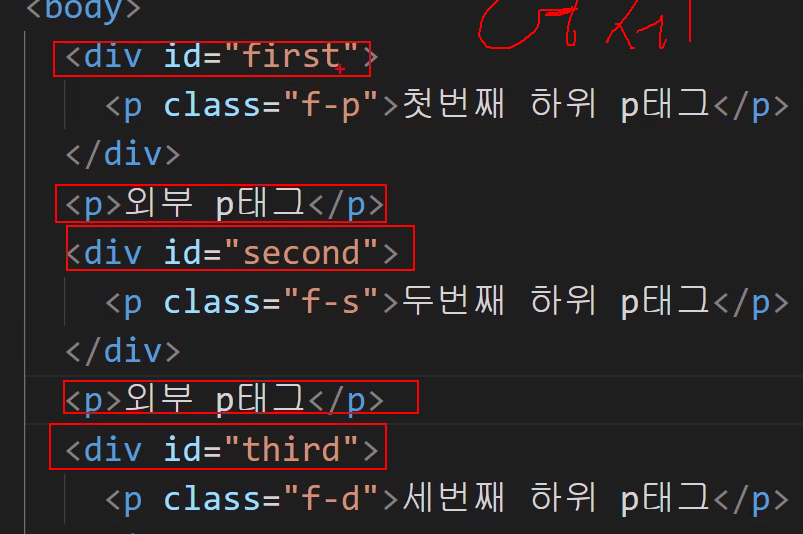
바깥쪽에 있는게 부모 태그 안에있는 것이 자식이 됨 ↓

형제 ↓

아이디가 가장 우선 -> 클래스->타입 순으로
되도록 겹치지않도록 작업하는 것이 좋으나 겹치면 위의 순으로 적용됨
폰트설정하기
px(픽셀) ,em, %, pt
단위 작업은 픽셀로 함

줄 간격 설정하기
|
font: [weight, style, variant] [size/height], [family] 순서
font:bold italic small-caps 30px/150% "굴림", Gulim;
이런식으로 만듦 // 글자크기랑 글꼴 설정은 생략 불가능
|
font 색깔

버튼보다 a태그를 주로 사용하는데 text-decoration: none; 을 자주사용.
폰트 다운받아서 사용하기

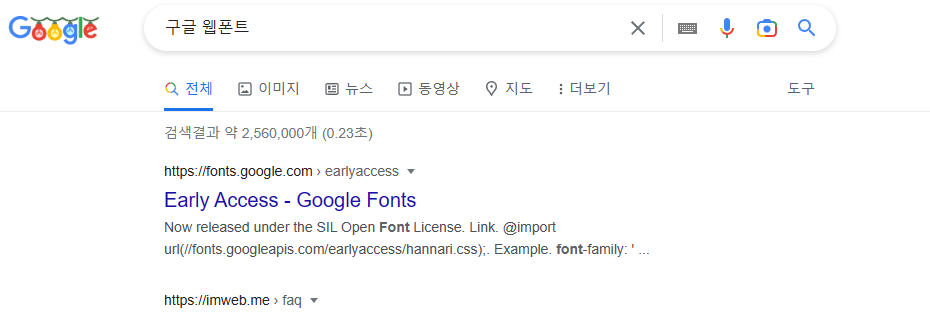
Google Fonts
Making the web more beautiful, fast, and open through great typography
fonts.google.com
구글 웹 폰트 이용

스타일을 다운받으면 html에 넣어야함
스타일에서 스타일 태그 빼고 import 부분만 넣으려면 css부분에 복사한 것을 import만 해주면됨
,패밀리 순

눈누
상업용 무료한글폰트 사이트
noonnu.cc
눈누도 사용가능
폰트이름: merienda 만들어보기
글꼴색:gold
body {
background-color:black;
}

@import url('https://fonts.googleapis.com/css2?family=Merienda:wght@800&family=Noto+Sans+KR&display=swap');
body{
  background-color:black;
}

h1{
 font-family: 'Merienda',cursive;
  font-size: 100px;
  color: gold;
  text-shadow:  0 0 30px white;
  font-weight :100;
}
<!DOCTYPE html>
<html lang="en">
<head>
<meta charset="UTF-8">
<meta http-equiv="X-UA-Compatible" content="IE=edge">
<meta name="viewport" content="width=device-width, initial-scale=1.0">
<title>Document</title>
<link rel="stylesheet" href="css/style.css">
<style>
@import url('https://fonts.googleapis.com/css2?family=Merienda:wght@800&family=Noto+Sans+KR&display=swap');
</style>
</head>
<body>
<h1>
HTML5 & CSS
</h1>
</body>
</html>결과물

시간이 없어서 이정도만함. 나는 역시 디자인에 소질이없다. 그렇다 나는 백엔드 개발자 할 운명이다.
목록 만들기
html 은 ol,ul,li 태그를 이용
파비콘

탭 맨 왼쪽에 있는 이미지
16x16이면 충분함
단축키는 32x32
데스크탑용 96x96
애플터치 180x180
파비콘 만들어보기
<!DOCTYPE html>
<html lang="en">
<head>
  <meta charset="UTF-8">
  <meta http-equiv="X-UA-Compatible" content="IE=edge">
  <meta name="viewport" content="width=device-width, initial-scale=1.0">
  <title>Document</title>
  <link rel="icon" href="img/pepe.jpg">
  <link rel="stylesheet" href="css/style2.css">
</head>
헤드에 경로 넣어줌

페페로 파비콘 바뀜
구글에 폰트어썸 클릭 후
Font Awesome
The internet's icon library + toolkit. Used by millions of designers, devs, & content creators. Open-source. Always free. Always awesome.
fontawesome.com


무료 폰트 복사

html 바디부분에 넣어줌

styleclass 에서도 수정 가능
배경 넣기
투명도 설정
Free Gradients Collection by itmeo.com
Free collection of 180 background gradients that you can use as content backdrops in any part of your website.
webgradients.com
이런데서 복사해서 쓰자.. 나는야 이제 풀스택개발자!
인라인 - span, a, b, u, i, strong
- 한줄에 여러개 배치
- 기본 너비값: 컨텐츠 크기값
-크기값을 가질 수 없음
-상하 마진값은 불가능, 좌우만 가능
span{
  border: 1px solid red;
  width: 500px;
  margin-top: 10px;
  margin-bottom: 10px;
  margin-left: 10px;
  margin-right: 10px;
}
블록 - div, h1~h6,ul,ol,li
한줄에 한개
기본너비값은 100%
크기 설정 가능
-상하좌우 마진값은가능
인라인 블록: img
한줄에 여러개 배치
기본너비값 컨텐츠 크기값
크기 설정 가능
상하좌우 마진값 가능
마진


위의 이미지에 margin border padding 다나옴~!
네비게이션 바 만들기
<!DOCTYPE html>
<html lang="en">
<head>
  <meta charset="UTF-8">
  <meta http-equiv="X-UA-Compatible" content="IE=edge">
  <meta name="viewport" content="width=device-width, initial-scale=1.0">
  <title>Document</title>
  <link rel="stylesheet" href="css/style2.css">
</head>
<body>
  <ul class="nav">
    <li><a href="#">HTML</a></li>
    <li><a href="#">CSS</a></li>
    <li><a href="#">JAVA</a></li>
    <li><a href="#">JSP</a></li>
    <li><a href="#">JavaScript</a></li>
  </ul>
</body>
</html>
.nav {
  list-style: none;
}

/*
아래 처럼 전체로 잡는것 보다 아래 두 번째 방법 처럼 구체적으로 하는게 좋다.
a {
  text-decoration: none;
} */

.nav li a {
  text-decoration: none;
}

.nav li {
  float: left;
  text-align: center;
  width: 10%;
}
박스 모델
html의 태그들을 사각형으로 인식해서 처리 ->
table {
  width: 50%;
  border: 1px solid black;
  /* border-collapse: collapse; */
  table-layout: fixed;
  caption-side: bottom;
  empty-cells: hide;
}

td, th{
 border: 1px solid black;
}

img{
width: 50px;
vertical-align: auto;
}
<!DOCTYPE html>
<html lang="en">
<head>
<meta charset="UTF-8">
<meta http-equiv="X-UA-Compatible" content="IE=edge">
<meta name="viewport" content="width=device-width, initial-scale=1.0">
<title>Document</title>
<link rel="stylesheet" href="style5.css">
</head>
<body>
<table>
<caption>표 제목 </caption>
<tr>
<th>머리글</th>
<th></th>
<th></th>
<th></th>
</tr>
<tr>
<td><img src="pepe.jpg">내용</td>
<td></td>
<td>내용</td>
<td>내용</td>
</tr>
<tr>
<td>내용</td>
<td>내용</td>
<td></td>
<td>내용</td>
</tr>
<tr>
<td>내용</td>
<td>내용</td>
<td>내용</td>
<td>내용</td>
</tr>
</table>
</body>
</html>테이블 기본속성
포지션
float : left-> 해당 요소를 컨테이너의 왼쪽 배치
float : right-> 해당 요소를 컨테이너의 오른쪽 배치
float:none-> float 적용 안함
margin auto->중앙배치!
'국비지원(국비교육) 웹 개발자 과정' 카테고리의 다른 글
| 국비지원 JAVA(자바) 프로그래밍 (카카오톡 프로필사진만들기) (0) | 2022.12.19 |
|---|---|
| 국비지원 JAVA(자바) 프로그래밍 (박스사이징) (0) | 2022.12.16 |
| 국비지원 JAVA(자바) 프로그래밍( Visaul Studio Code( VS CODE) 비쥬일 스튜디오, (0) | 2022.12.14 |
| 국비지원 JAVA(자바) 프로그래밍(자바, MariaDB, 마리아디비 ) (0) | 2022.12.13 |
| 국비지원 JAVA(자바) 프로그래밍(네트워크,OSI7계층,클라이언트,서버 동작과정, ) (0) | 2022.12.12 |